.png)
Preface
This guide is intended for technicians installing Miralix Teams CC Presence. The technician should be trained as an IT support specialist or have equivalent qualifications. Relevant knowledge of Microsoft Teams, Microsoft SQL Server, Microsoft Entra ID and Microsoft Office 365 is also required. Miralix Teams Presence supports multiple Microsoft Teams environments. Miralix Teams Presence retrieves presence information from Microsoft Teams so that Miralix clients can display Microsoft Teams presence for internal contacts. Configure the Miralix Teams Presence service in Miralix Wrench on the Microsoft Teams Presence tab. See the Miralix Wrench user guide for additional information. Miralix Teams Presence can set a Miralix user's Microsoft Teams presence to In a Call when the user's mobile phone or work phone is busy. See the Miralix Wrench user guide for additional information.
GDPR - General Data Protection Regulation
The General Data Protection Regulation (GDPR) requires customers installing Miralix software to
determine the scope and retention period of stored data. All Miralix customers are offered a data
processing agreement. By default, Miralix has no obligations relating to this data storage.
Prerequisites for Miralix Teams Presence
The following prerequisites must be in place before the Miralix Teams Presence service can operate.
Microsoft Office 365 / Microsoft Azure
Create the app registration through the Azure portal.
Important: Administrator privileges are required.
Create Azure app access
Sign in to Azure Portal ». See Figure 1.
Figure 1
Register Miralix Teams Presence in Azure portal
-
Sign in to Azure Portal with an administrator account. See Figure 2 and the Microsoft guide
Register a new application using the Azure portal ». If the administrator account has access to multiple Microsoft Entra ID tenants, select the tenant to which Miralix Teams Presence requires access using the account menu in the upper-right corner.
Figure 2
-
Select "Microsoft Entra ID", then select "App registrations". If Microsoft Entra ID is not displayed, select "More services". See Figure 3.
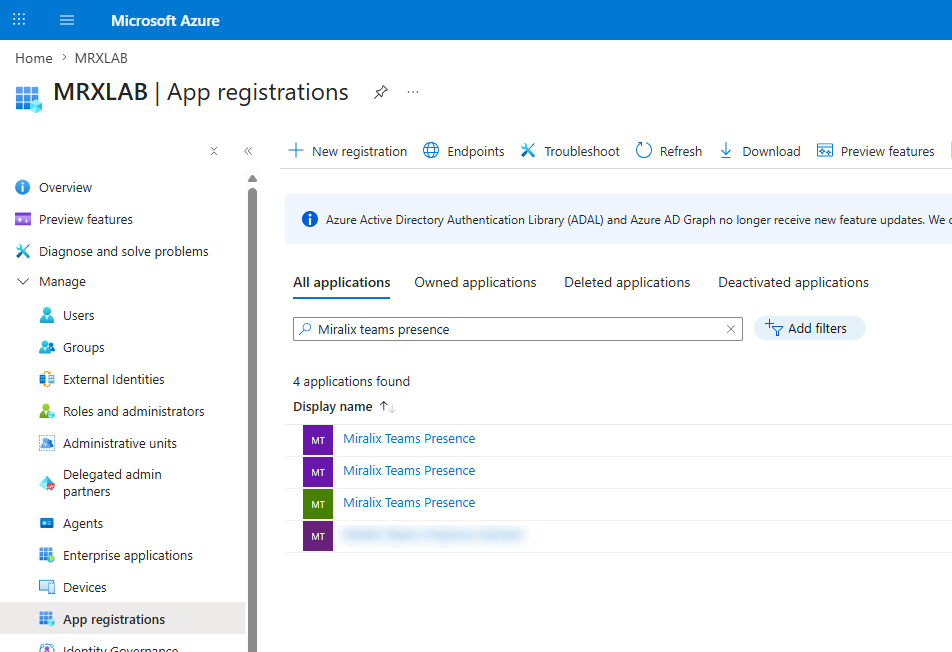
Figure 3
-
To allow Miralix Teams Presence to sign in and retrieve Microsoft Teams presence, select "New
registration", enter a name and choose the supported account type. The example in Figure 4
uses the name "Miralix Teams Presence" and the supported account type "Single tenant only -
MRXLAB".
Supported account types- "Single tenant only - MRXLAB”
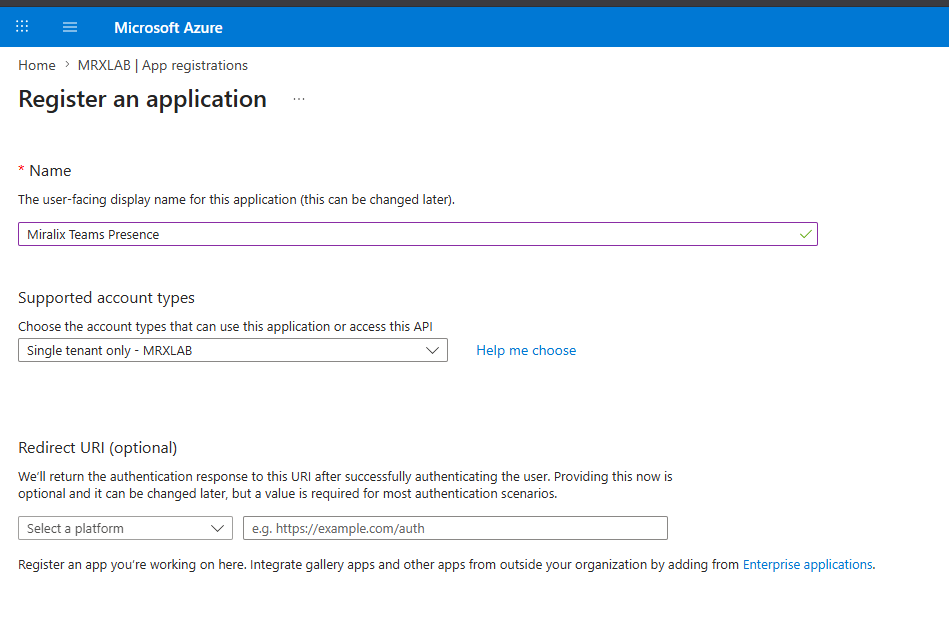
Figure 4
-
Select "Register".
Assign permissions to Miralix Teams Presence (app registration)
Assign the following Microsoft Graph application permissions so that Miralix Teams Presence can
retrieve Microsoft Teams presence information:
-
Presence.Read.All - Read presence information of all users in your organization
-
User.ReadBasic.All- Read all users' basic profiles
-
Select "API permissions".
-
Select "Add a permission", then select "Microsoft Graph". See Figure 5.
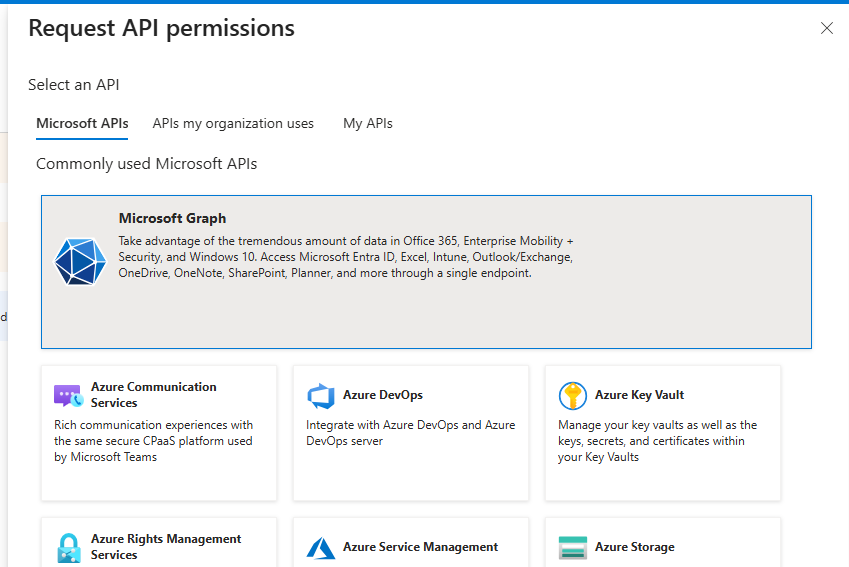
Figure 5
-
Select "Application permissions", search for the required permissions, and select
Presence.Read.All and User.ReadBasic.All. See Figure 6.
-
Presence.Read.All
-
User.ReadBasic.All
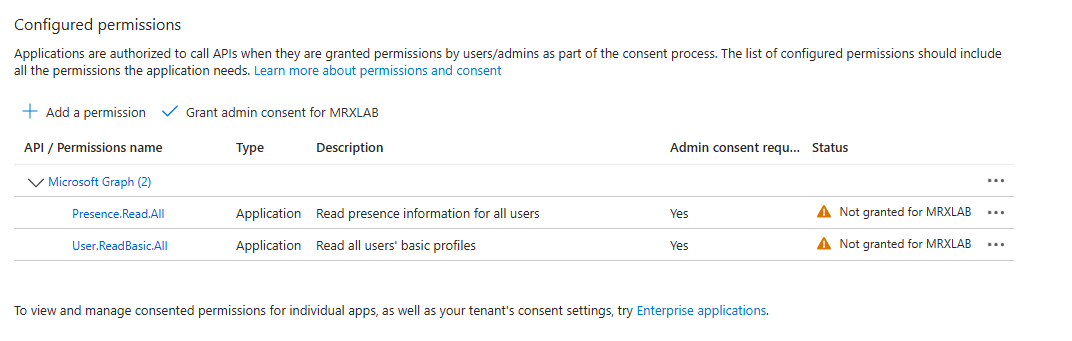
Figure 6
Grant admin consent
Important: Admin consent must be granted before the permissions are available.
See figure 7.
-
Select "Grant admin consent for ...". See Figure 7.
-
Select "Yes" to confirm.

Figure 7
The message "Successfully granted admin consent for the requested permissions" is displayed. See
Figure 8.
Figure 8
Retrieve the client ID and tenant ID
The client ID and tenant ID are required when configuring Miralix Teams Presence in Miralix Wrench.
Store both values securely until the installation is complete.
-
Select "Overview".
-
Copy the "Application (client) ID" and "Directory (tenant) ID" and save them for later use. See
Figure 9.
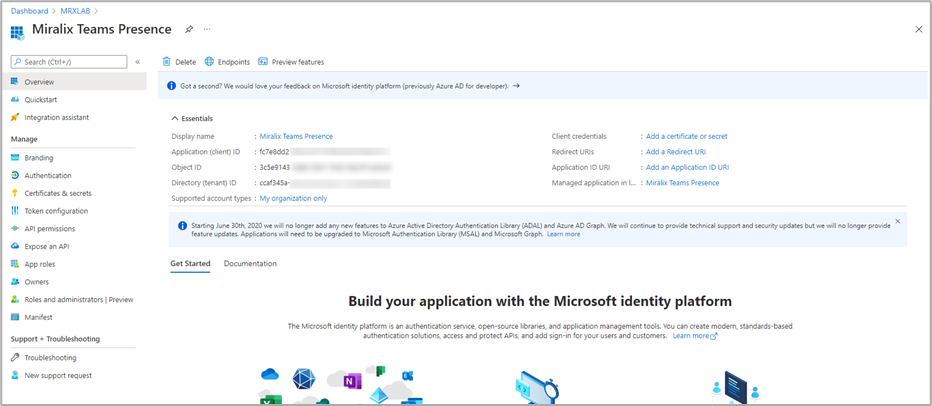
Figure 9
Set Teams presence to "In a Call" based on mobile and work
phone busy status
If Miralix receives mobile phone or work phone status for Miralix users, it can set the user's Microsoft
Teams presence to In a Call when the user's mobile phone or work phone is busy. To use this feature, add or change an API permission on the app registration.
The feature can be enabled for mobile phone status only, work phone status only, or both. See the
Miralix Wrench user guide for additional information.
Configure app registration permissions in Azure
Assign the following additional Microsoft Graph application permission so that Miralix Teams Presence can set presence for Microsoft Teams users:
Note: Presence.Read.All can be removed because Presence.ReadWrite.All includes the same
permissions and additional write access.
-
Presence.ReadWrite.All - Read and write presence information for all users
-
Select "API permissions".
-
Select "Add a permission", then select "Microsoft Graph". See Figure 10.
-
Select "Application permissions", search for Presence.ReadWrite.All, and select it. See Figure
10.
-
Presence.ReadWrite.All
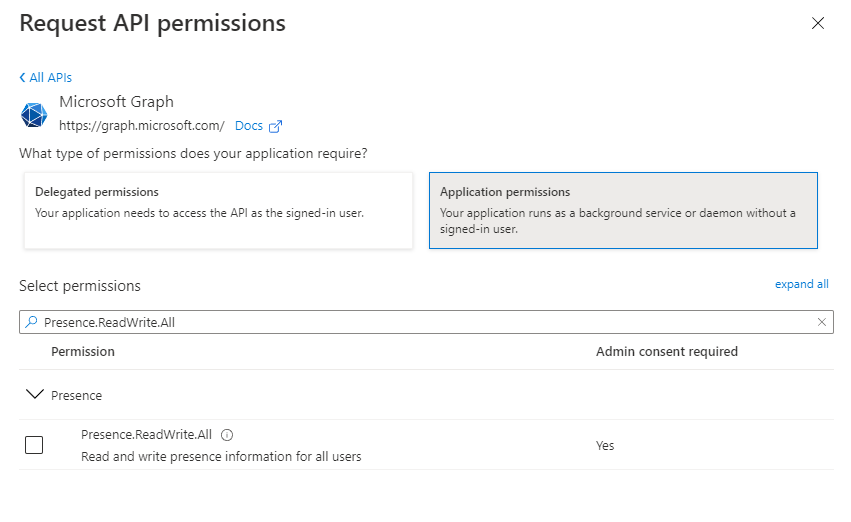
Figure 10
Grant admin consent
Important: Admin consent must be granted before Presence.ReadWrite.All is available.
-
Select "Grant admin consent for ...". See Figure 11.
-
Select "Yes" to confirm.
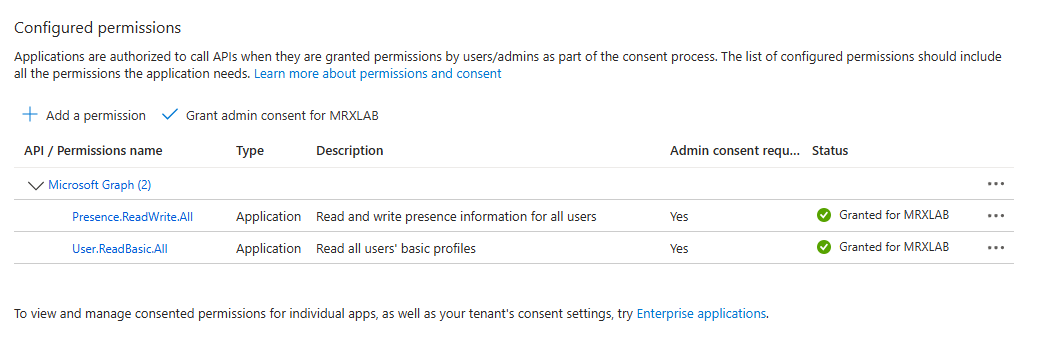
Figure 11
Configure the app registration client secret in Azure
To allow Miralix Teams Presence to read and/or set presence for Microsoft Teams users, create a client secret for the app registration in Azure.
-
Select "Certificates & secrets" under the Miralix Teams Presence app registration.
-
Under "Client secrets", select "+ New client secret".
-
Enter a description, choose when the secret expires, and select "Add". See Figure 12.
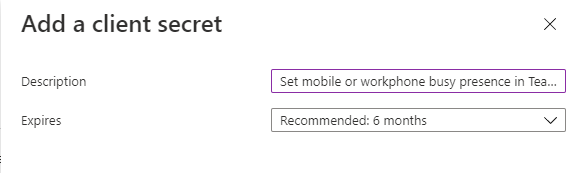
Figure 12
Important: Save the secret value immediately. It is required for configuration in Miralix Wrench and
is not displayed again after you leave the page.
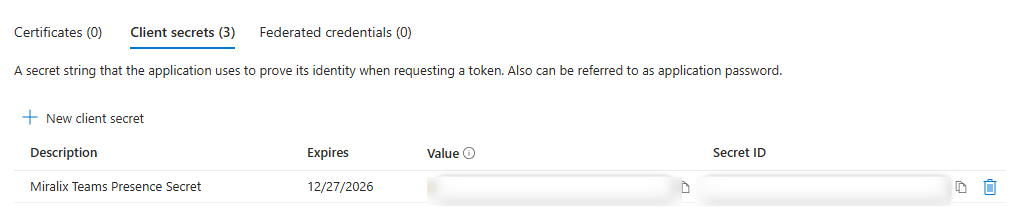
Figure 13
Continue the installation of Miralix Teams Presence in Miralix Wrench.
Installation of Miralix Teams Presence
The prerequisites required to install Miralix Teams Presence have now been created.
Please contact Miralix to arrange the installation.