.png)
Preface
This guide is for technicians who are to install Miralix DataImport. The technician should be trained as an IT Supporter or have equivalent qualifications. In addition, the technician should have relevant knowledge of Microsoft Azure.
From version 6.1.X, Miralix DataImport can be used to import users from an Azure Tenant, as well as export statistics tables to another SQL database.
When a user has been imported from Azure, the user can validate logins from Miralix clients using the login type Microsoft 365.
Please note: During the data import to the Miralix Greenbox database, DataImport will adjust the length of data from AD, enabling insertion in the Greenbox database.
GDPR – General Data Protection Regulation
The General Data Protection Regulation (GDPR) or ”persondataforordningen” as it is often called in Denmark, means that customers who install Miralix software must consider the scope and duration of data storage. All Miralix customers are offered a data processor agreement, as Miralix as a standard has no obligations regarding this data storage.
Prerequisites for Miralix DataImport
For Miralix DataImport to work, some prerequisites need to be in place. Please see the document called Miralix system requirements.
Configuration of Miralix DataImport import via Microsoft Entra ID
Miralix DataImport can import members of Azure groups from an Azure tenant. This is done through an App Registration on the tenant towards Microsoft Graph API.
If ”Miralix Sign-in” Enterprise Application has been added to Azure Tenant, Miralix applications can use Microsoft 365 as a login type.
Creating an app registration via Azure portal
There are some settings to be done before you can create and use Azure App on a tenant for Miralix DataImport.
Please note: This requires administrator rights.
App Registration for Miralix DataImport in Azure portal
-
Login to Azure Portal » with an administrator account (please see the guide Register a new application using the Azure portal »). See figure 1.
If the administrator account has access to multiple Microsoft Entra ID tenants, remember to choose the correct tenant (to which Miralix DataImport should have access). This is done by choosing the correct account at the upper right side.
Figure 1
2. Click "Microsoft Entra ID" and then "App registrations". Please see figure 2. If "Microsoft Entra ID" is not shown, click ”More services”.
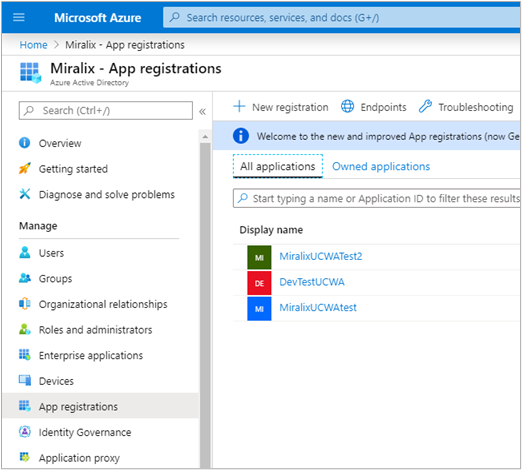
Figure 2
-
To enable Miralix DataImport to log in and retrieve user information, you need to register a new application. Click "New Registration", enter a name, and select the supported account types to be used. The example in figure 3 shows the following selection: Name- "Miralix DataImport"
Supported account types- "Accounts in any organizational directory” (“Domain” only – Single tenant)
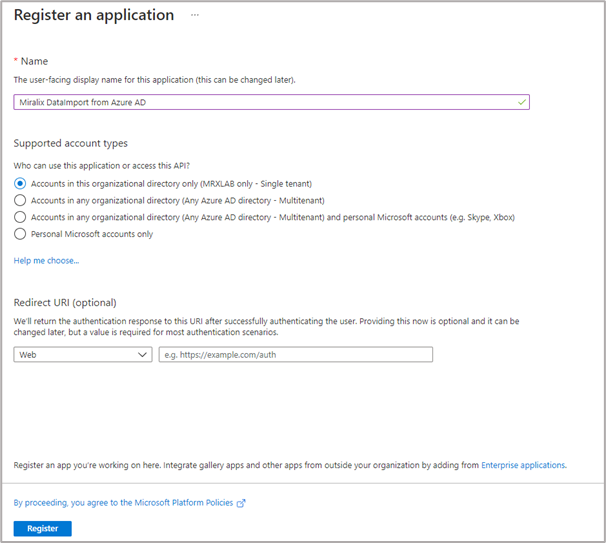
Figure 3
-
Click “Register”
Assign rights to Miralix DataImport (App registration)
For Azure to retrieve information, you need to assign rights to Miralix DataImport. The rights to be assigned are:
-
GroupMember.Read.All- Read all group memberships -
User.Read- Sign in and read user profile -
User.Read.All- Read all users' full profiles
-
Click ”API permissions”.
-
Click ”Add a permission” and choose "Microsoft Graph". Please see figure 4.
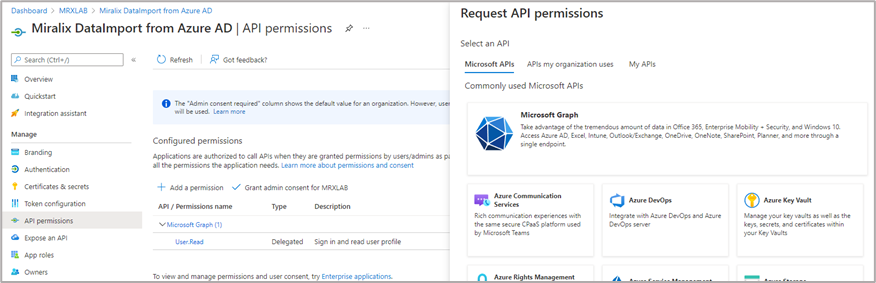
Figure 4
-
Choose "Application permissions", search for the rights you need and select them. Please see figure 5 and 6:
-
GroupMember.Read.All
-
User.Read
-
User.Read.All
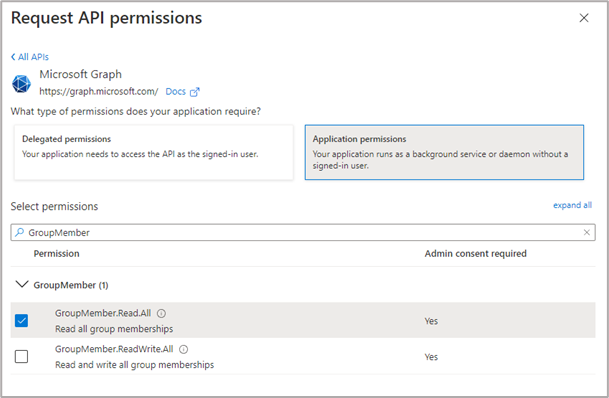
Figure 5
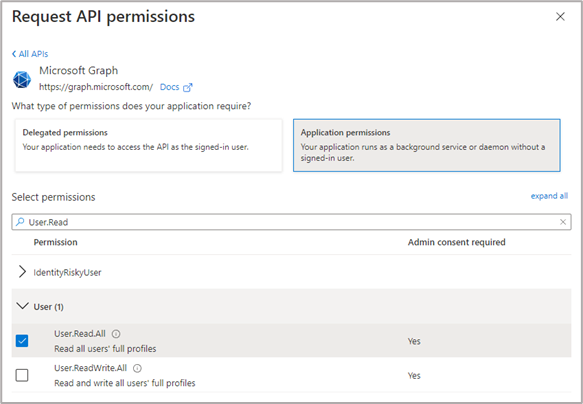
Figure 6
Grant admin consent
Please note: For the ”GroupMember.Read.All” and ”User.Read.All” rights to be assigned, "Grant admin consent for <DomainName>" is required. Please see figure 7.
-
Click ”Grant admin consent for <DomainName>”
-
Click ”yes”

Figure 7
After this, you will see the message "Successfully granted admin consent for the requested permissions". Please see figure 8.
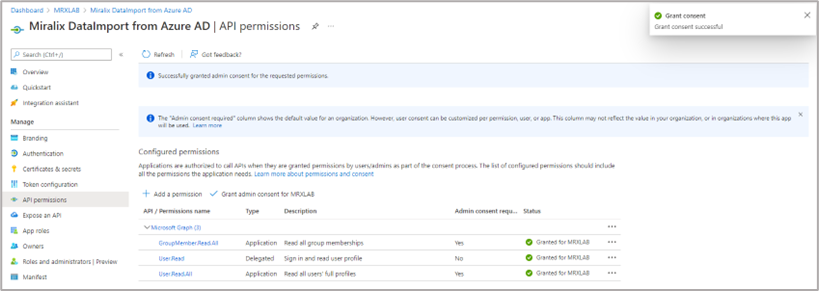
Figure 8
Create client secret for Miralix DataImport app registrationen
For Miralix DataImport to connect to the app registration and import user information from Azure, a “Client secret” needs to be created. Please see figure 9.
-
Click ”Certificates & secrets”
-
Click ”New client secret”
-
Fill out description
-
Select the desired expiration.
Please note: Remember to change the ”Client secret” before it expires.
-
Click Add.
-
Copy ”Client Secret Value” and NOT the “Client Secret ID”, save it for later use. Please see figure 10.
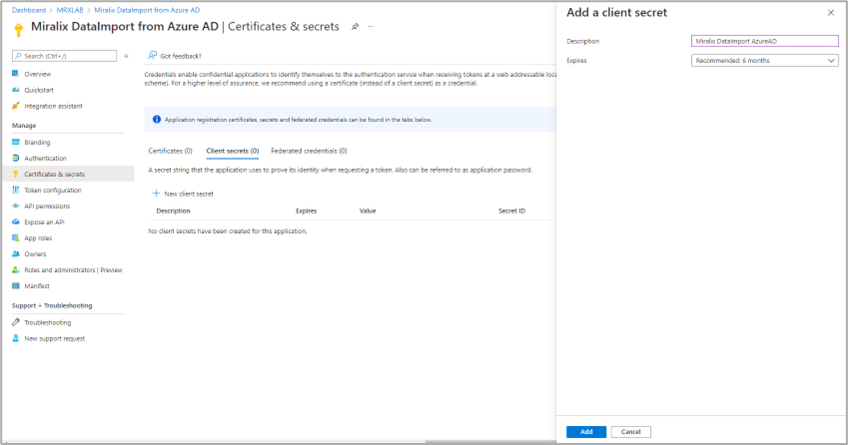
Figure 9
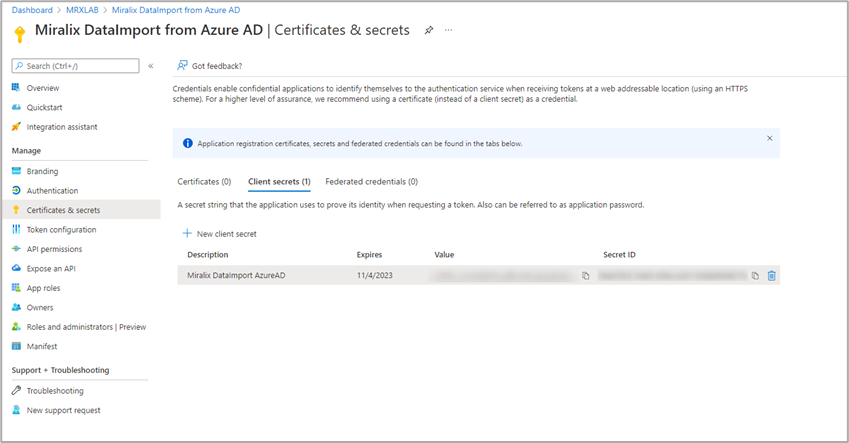
Figure 10
Save client and tenant ID
Client and tenant ID is required for the configuration of Miralix DataImport in Miralix Wrench. Therefore, it is a good idea to save these in a document, until the installation is completed.
-
Click ”Overview”
-
Copy ”Application (client) ID” and ”Directory (tenant) ID” and save them for later use. Please see figure 11.
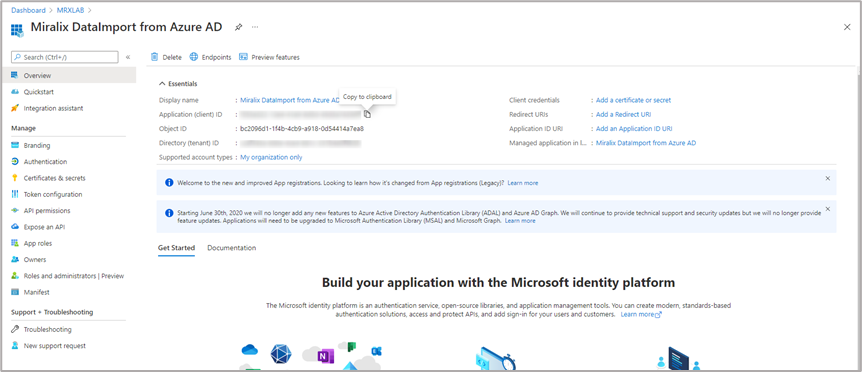
Figure 11
The App Registration for Miralix DataImport has now been created. Please proceed with the configuration of Miralix DataImport from Azure, as described in the Miralix Wrench guide.
Configuration of client login type Microsoft 365 (Enterprise Application)
For users to log in to Miralix applications with the login type Microsoft 365, the Miralix Sign-in Enterprise applications must be added to Azure tenant. Please see figure 12.
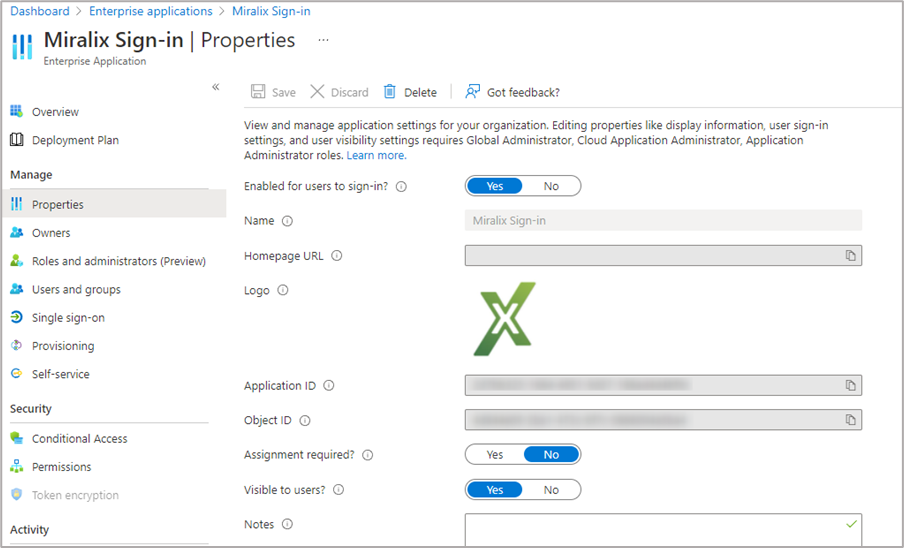
Figure 12
Add Miralix Sign-in Enterprise application to Azure tenant
Start a Miralix client that uses version 6.1.X or newer and select Microsoft 365 as login type.
To add the Miralix Sign-in Enterprise application, log in with a user that has administrator rights.
Miralix Sign-in will then ask for permissions, which the administrator can approve by ticking off
”Consent on behalf of your organization” and clicking Accept. Please see figure 13.
After this, Azure imported users will be able to use Microsoft 365 as a login type in Miralix clients.

Figure 13
Miralix DataImport installation
The necessary prerequisites for Miralix DataImport have been created and therefore, the DataImport can be installed. Please contact Miralix in order to complete the installation.