.png)
Preface
This guide is intended for technicians who install Miralix Proxy Service. The technician should be trained as an IT support technician, or have equivalent qualifications. In addition, the technician should have relevant knowledge of Microsoft Azure.
Proxy Service is a server component responsible for license management and communication between services installed on the Miralix server and client applications such as Miralix Desktop and Miralix Office Operator. It also provides functionality for sending email.
GDPR - General Data Protection Regulation
The General Data Protection Regulation (GDPR), commonly referred to as the data protection regulation, means that customers who have Miralix software installed must decide on the scope and retention period of data storage. All Miralix customers are offered a data processing agreement, as Miralix generally has no obligations regarding this data storage.
Prerequisites for Miralix Proxy Service
Before Proxy Service can send emails, a number of prerequisites must be in place.
Email Service - Microsoft Graph
Before Microsoft Graph can be used as the email service in Miralix Proxy, an App registration must be
created in Azure.
Microsoft Entra ID App Registration
An App registration must be created for the Miralix Proxy email service.
The App registration must have the following API permissions:
-
Application – Mail.Send
-
Application – Mail.ReadWrite
These permissions are required for Miralix Proxy to send emails.
Creating an App Registration in Microsoft Entra ID
See also the Microsoft guide: https://docs.microsoft.com/en-us/graph/auth-register-app-v2 ).
-
Sign in to the Azure portal with an administrator account:(https://portal.azure.com/ )
See figure 4.
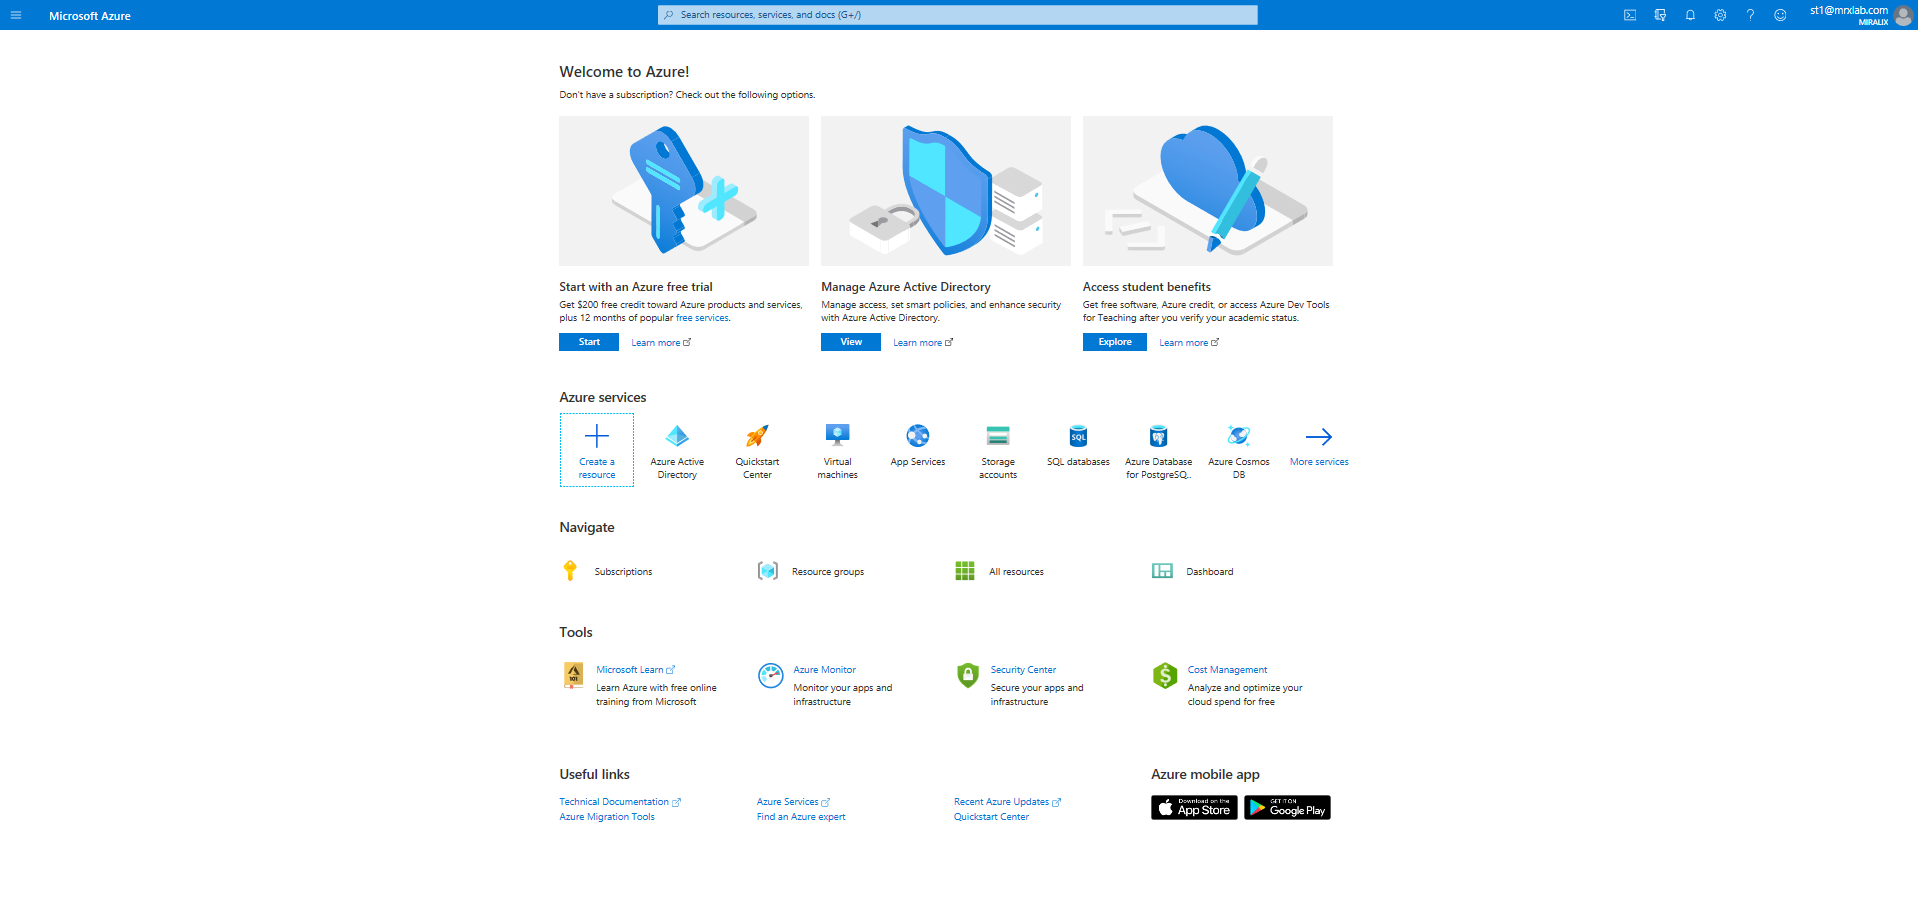
Figure 4
-
Click "Microsoft Entra ID". The Tenant ID can be viewed and copied from the "Tenant information" box under Overview. See Figure 5.
Important: Make sure that the correct tenant is selected - the tenant from which Miralix
Proxy will send emails. You can select another tenant by clicking "Switch tenant" and
choosing the correct account.
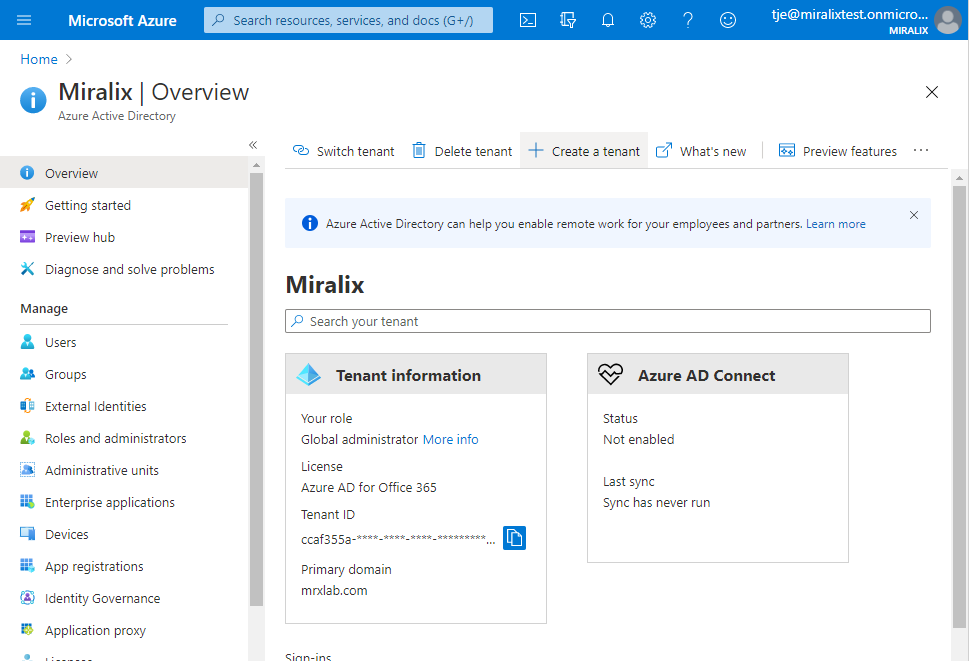
Figure 5
-
Click "App registrations". See Figure 6. If "Microsoft Entra ID" is not displayed, click "More services".
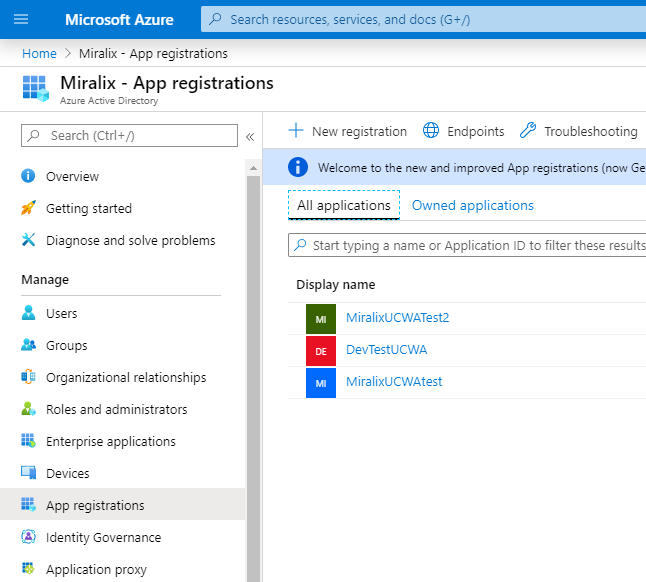
Figure 6
-
To allow Miralix Proxy to send emails, register a new application. Click "New registration", enter a
name, and select the supported account type that can be used.
In the example shown in Figure 7, the following values are selected:
Name: "Miralix Proxy Graph E-mail Service"
Supported account types: " Accounts in this organizational directory only (Miralix only - Single tenant)”
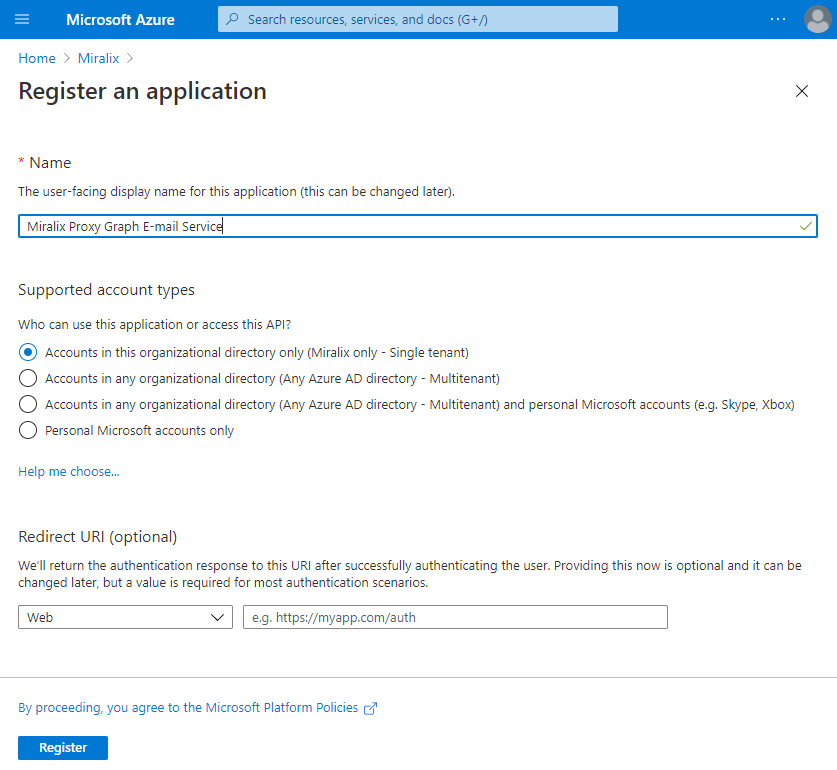
Figure 7
-
Click "Register".
-
The Client ID can now be viewed and copied from "Application (client) ID" under Overview. See
Figure 8.
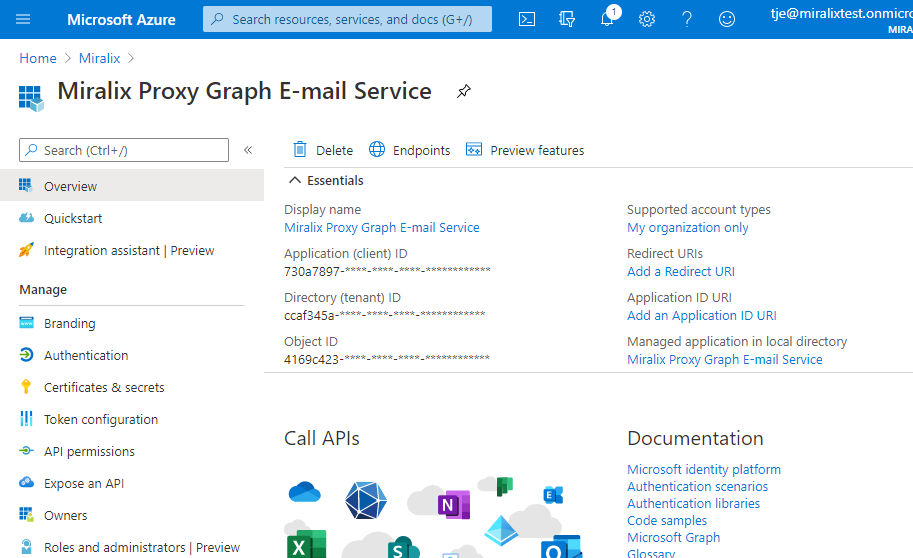
Figure 8
Assigning Permissions to Miralix Proxy Graph E-mail Service
Permissions must be assigned to Miralix Proxy Graph E-mail Service before it can send emails.
The following permissions must be granted:
-
Application – Mail.Send
-
Application – Mail.ReadWrite
-
Open the App Registration created for Miralix Proxy Graph E-mail Service.
-
Click "API permissions".
-
Click "Add a permission" and select "Microsoft Graph". See Figure 9.
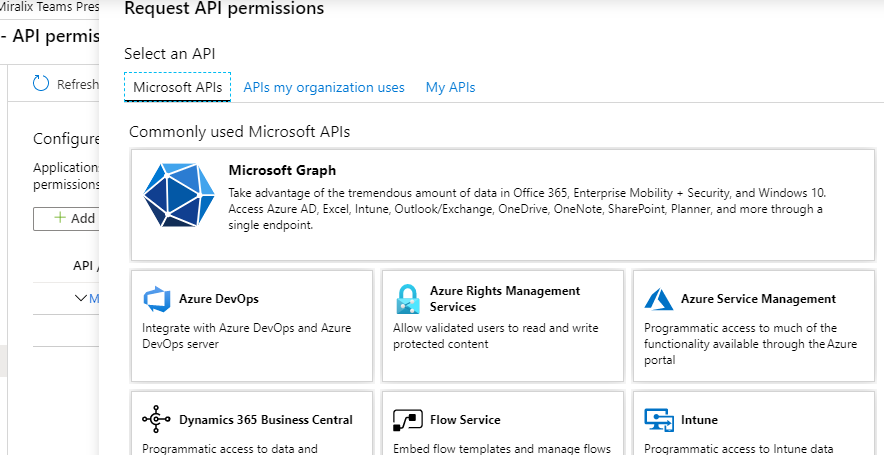
Figure 9
-
Select "Application permissions", search for the Mail.Send and Mail.ReadWrite permissions, and
select both permissions. See Figure 10.
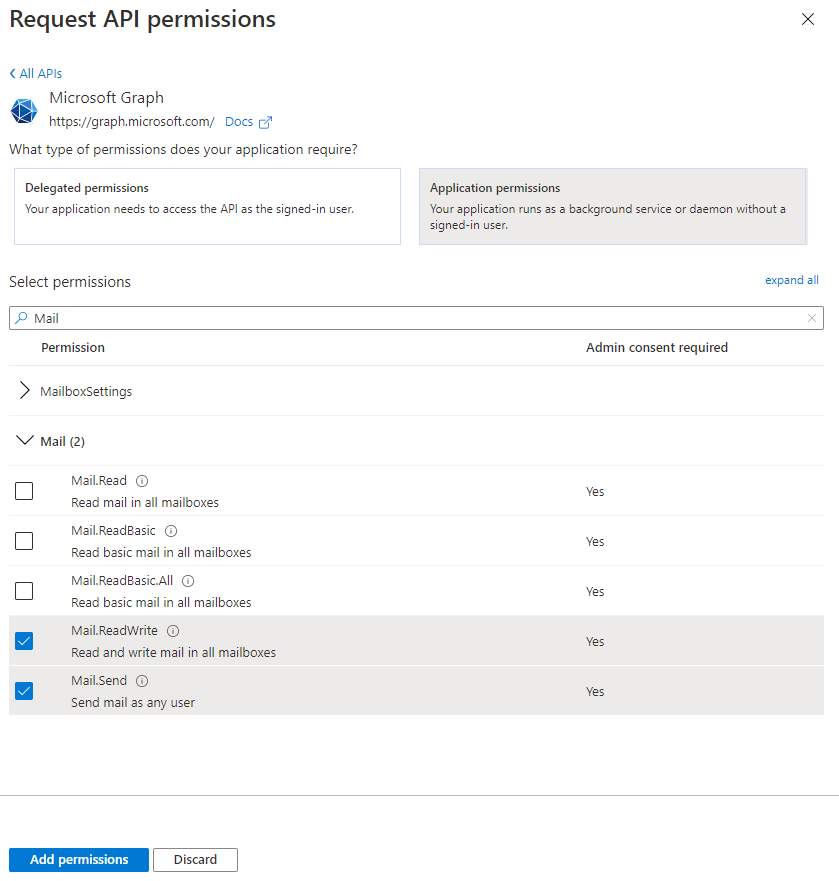
Figure 10
-
Click "Add permissions".
Note: The Mail.Send and Mail.ReadWrite permissions require "Grant admin consent for ..."
before Miralix Proxy can use them correctly.
-
Click "Grant admin consent for ..." and then click "Yes" to grant admin consent for all permissions.
See Figure 11.

Figure 11
-
The status "Granted for ..." will then be shown for each permission. See Figure 12.
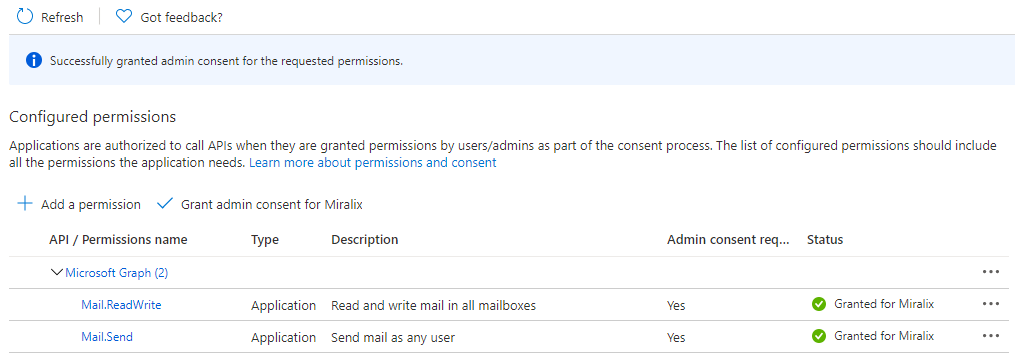
Figure 12
Creating a Client Secret
A Client Secret must be created for the application so that Miralix Proxy can authenticate.
-
Open the App Registration created for Miralix Proxy Graph E-mail Service.
-
Click "Certificates & secrets".
-
Under Client secrets, click "New client secret".
-
Enter a description and select an expiration date. See Figure 13.
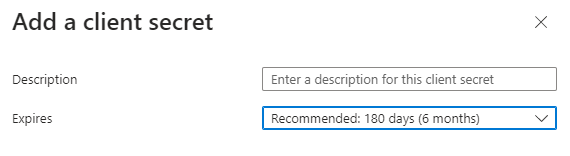
Figure 13
-
Click "Add".
Important: Remember to copy the Value and, if necessary, store it in a secure location.
This Client Secret is displayed only once.
Note: If the Client Secret is lost, a new one can be created and the Client Secret for Miralix
Proxy can be updated in Wrench.
If the Client Secret is deleted from Azure, Miralix Proxy may still be able to send emails using that Client Secret for up to 2 hours. The Miralix Proxy email service can be configured in Miralix Wrench. See the Miralix Wrench documentation for further information.
Installation of Email Sending via Miralix Proxy Service
The required prerequisites have now been created, allowing Miralix Proxy Service to be configured for email sending.
Please contact Miralix to have the installation completed.